


Catch up
Dearest gentle reader,
It’s been many moons since we last indulged. As the sun rises once more, I bid you the warmest of welcomes to yet another curious and exciting article. For today, we shall be discussing the ins and outs of building your own private equivalent of ChatGPT.
As you may be aware, ChatGPT is a powerful language model that can be used to generate text, translate languages, write different kinds of creative content, and answer your questions in an informative way.
But what if you want to utilize the power of ChatGPT without having to worry about your privacy? That's where privateGPT comes in. So, without further ado, allow me to escort you through the pages of a new chapter, where a private version of ChatGPT shall grace the stage, promising a tale of innovation, promise, wonder, and perhaps a touch of scandal.
I am Agin; this is SheCode Africa- Nairobi, and you are most welcome.
Introduction
The power of conversational chatbots cannot be downplayed. But their knowledge is limited to the data in which they were trained. And that is a lot of data, but there comes a time when you want to query it on very personal and sensitive areas that you would not otherwise find on the web and/or would not be willing to upload to the internet. Imagine the possibilities if you could harness the power of Large Language Models (LLMs) for engaging with your personal documents privately, all without the need to transfer them to online platforms. This is the focus of our article today.
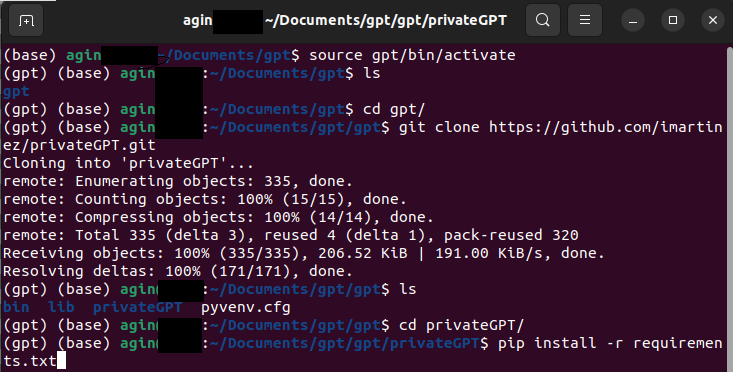
Step 1: Clone or Download the Repository
With Git installed on your computer, navigate to a desired folder and clone or download the repository. This will create a new folder called privateGPT that you can then cd into (cd privateGPT)
As an alternative approach, you have the option to download the repository in the form of a compressed zip file by clicking on the "Code" button highlighted in green.
Once downloaded, transfer the zip file to a suitable directory and proceed to extract its contents. This action will generate a directory named "privateGPT-main," which is recommended to be renamed as "privateGPT." Following this, you'll need to access the designated folder using the command line interface.
Step 2: Environment Setup
Install all requirements using the code
pip3 install -r requirements.txt
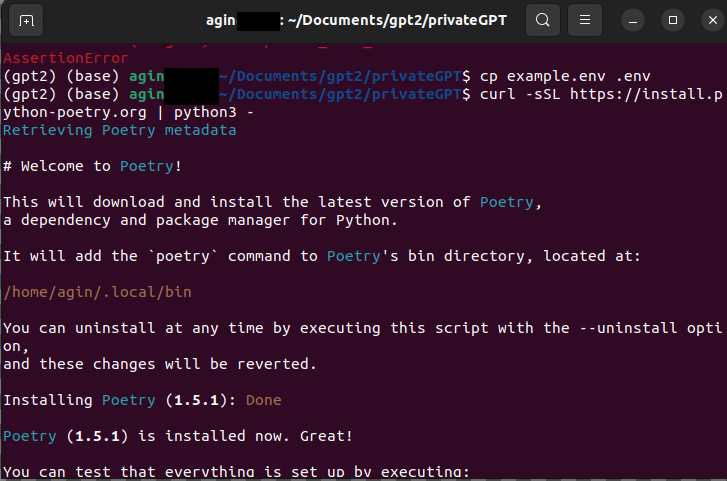
I, however, found that the requirements.txt file did not include all libraries, and I had to install many of them manually. Moreover, I kept getting a “You are using a deprecated configuration of Chroma” which I was unable to resolve. As such, I used an alternative approach and installed requirements using poetry
Install poetry
curl -sSLhttps://install.python-poetry.org| python3 -Run the following commands
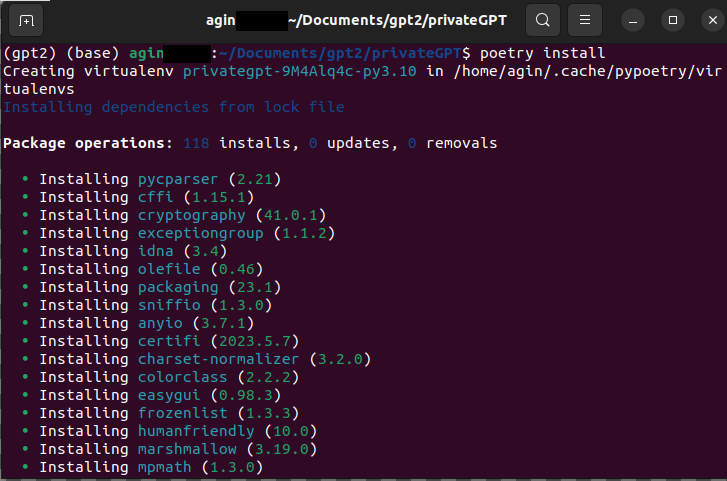
cd privateGPT poetry install poetry shell
Step 3: Download LLM Model
Proceed to download the Large Language Model (LLM) and position it within a directory that you designate. In my case, I created a new folder within privateGPT folder called “models” and stored the model there. By default, this is where the code will look at first. If you place it in another directory then be sure to update the .env file to reflect your file path.
By default, it is suggested to utilize ggml-gpt4all-j-v1.3-groovy.bin. Should you opt for an alternative GPT4All-J compatible model, you have the flexibility to download your preferred option and make a reference to it within your .env file.
PrivateGPT is preconfigured to function with GPT4ALL-J as the default option, but it also offers compatibility with llama.cpp. These two open-source Large Language Models (LLMs) have undergone training for tasks involving instruction following, similar to ChatGPT.
Next, duplicate the provided example.env template and save it as .env within your working environment.
cp example.env .env
Step 4: Upload your Documents.
This step shows how to create your knowledge base. Include your confidential documents within the "source_documents" directory, located as a subfolder within the "privateGPT" directory. Already downloaded in the “source_documents” folder is a sample document, "state_of_the_union.txt," that you can start with.
Refer to the list below for the file formats that are supported.
.csv: CSV, .docx: Word Document, .doc: Word Document, .enex: EverNote, .eml: Email, .epub: EPub, .html: HTML File, .md: Markdown, .msg: Outlook Message, .odt: Open Document Text, .pdf: Portable Document Format (PDF), .pptx : PowerPoint Document, .ppt : PowerPoint Document, .txt: Text file (UTF-8),
Step 5: Ingest your Data
Run the script below to ingest your data:
python ingest.py
Behind the scenes, PrivateGPT utilizes LangChain and SentenceTransformers to divide documents into 500-token segments and generate embeddings. DuckDB is employed to construct the vector database, with the outcome stored in the "db" folder of the project.
NOTE: Rerun this script whenever you upload or make changes to the source folder.
It's also important to note that LangChain requires internet connectivity initially to acquire the pre-trained embedding model, after which all processing occurs on your local machine without the need for internet access.
Step 6: Query Your Documents
Generating the vector database may take a few minutes depending on the number of documents. Once the preparation is complete, you can initiate the model using the following command:python privateGPT.py
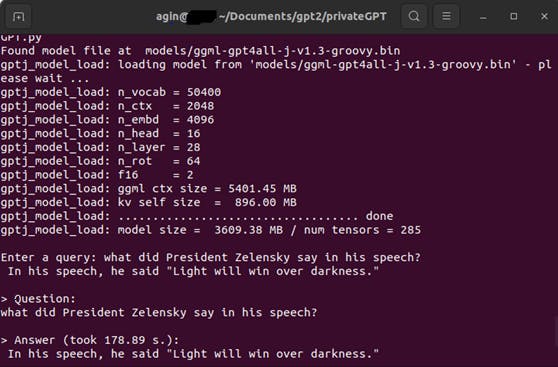
Thereafter, you can engage in conversation with your localized Large Language Model without constraints. It will address your inquiries and offer up to four references from your knowledge base for each response.
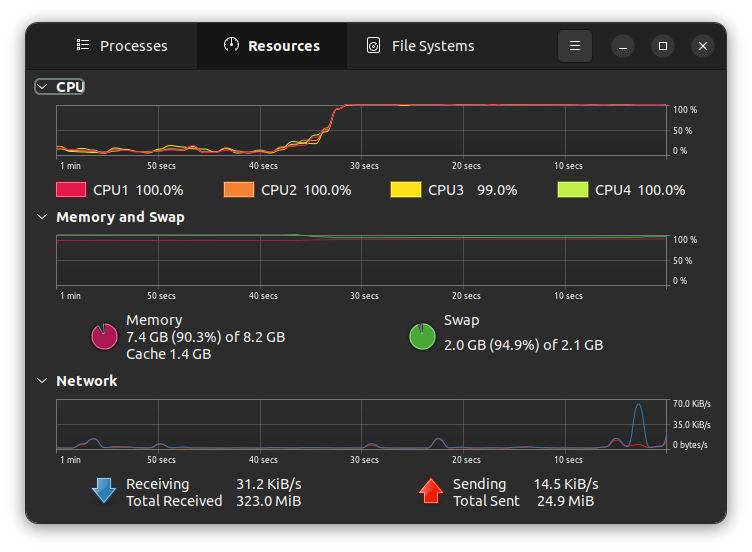
Keep in mind that PrivateGPT is an experimental endeavor. While not optimized for all hardware types, it provides a glimpse into the future possibilities of open-source Large Language Models, showcasing the diverse paths the field is embarking upon and the influential applications it can unlock. It is also currently quite computationally intensive as seen in the gallery images. Depending on your computer specifications, your queries may take longer or shorter.
Gallery
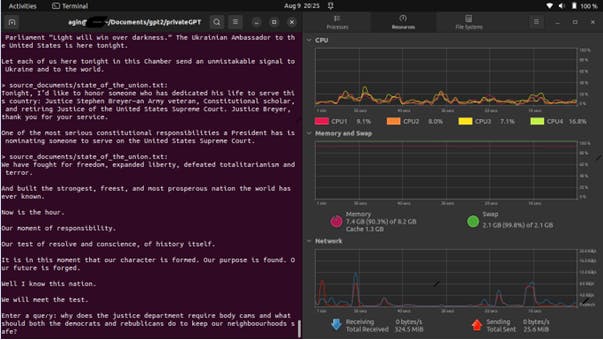
Sample Query and Answer using "State of The Union"
System at Resting state showing less than 10% CPU utilisation across 3 cores
When running a query. Note the sharp ascent in CPU usage, and the memory being utilized.
Conclusion
In this article, we learnt about privateGPT, an open-source project that allows you to parse your documents and interact with them using an LLM. We saw how to set up privateGPT and start asking it questions about your documents. We also learned about the benefits of using privateGPT, such as its privacy and security features, its ease of use, and its powerful capabilities.
If you are looking for a way to use the power of LLMs to interact with your private documents, then privateGPT is a great option. It is 100% private and free, and it can be used on any computer with Python 3.10 or later.
That has been it from me. See you on the next one. Be Safe. Be Kind. Peace.
In loving memory of Tonny Edgar. Rest well good Sir