

Launch Your Windows Machine on AWS EC2 - A Beginner's Guide

Hello, She Code Fam 👋🏿, it's been a while since we touched base. A lot has happened, with the best news being that I got certified as an AWS Cloud Practitioner. Whoop! Whoop! 💃🏿. So I decided, why not share AWS bits and bytes with you and simplify this knowledge?
Welcome to the exciting world of cloud computing, where you can spin up a virtual Windows machine with just a few clicks!
So, what is Amazon EC2? Consider EC2 as a virtual computer server floating in the Amazon data center, ready to be customized and used for various tasks. Are you in need of a powerful gaming or video editing machine or a web server? The cloud has you covered. Like renting a house, you choose your virtual server's size, features, and location, and voila! You have a virtual machine, accessible from any device as long as you have an internet connection.
Whether you're a complete AWS cloud newbie or not, this guide will hold your hand and walk you through the entire process until you have your favorite Windows operating system up and running in no time.
So how do you get started?
Sign up for AWS
First things first, you will need an AWS account. Don't worry if you don't have one. It's good that AWS has a generous free tier account that allows you to play around with AWS services, in this case, EC2, at no charge. Open this link to create an account.
NOTE: AWS offers a free tier for creating an ec2 instance but other additional resources like using an elastic IP address can result in additional costs, which lead to billing charges.
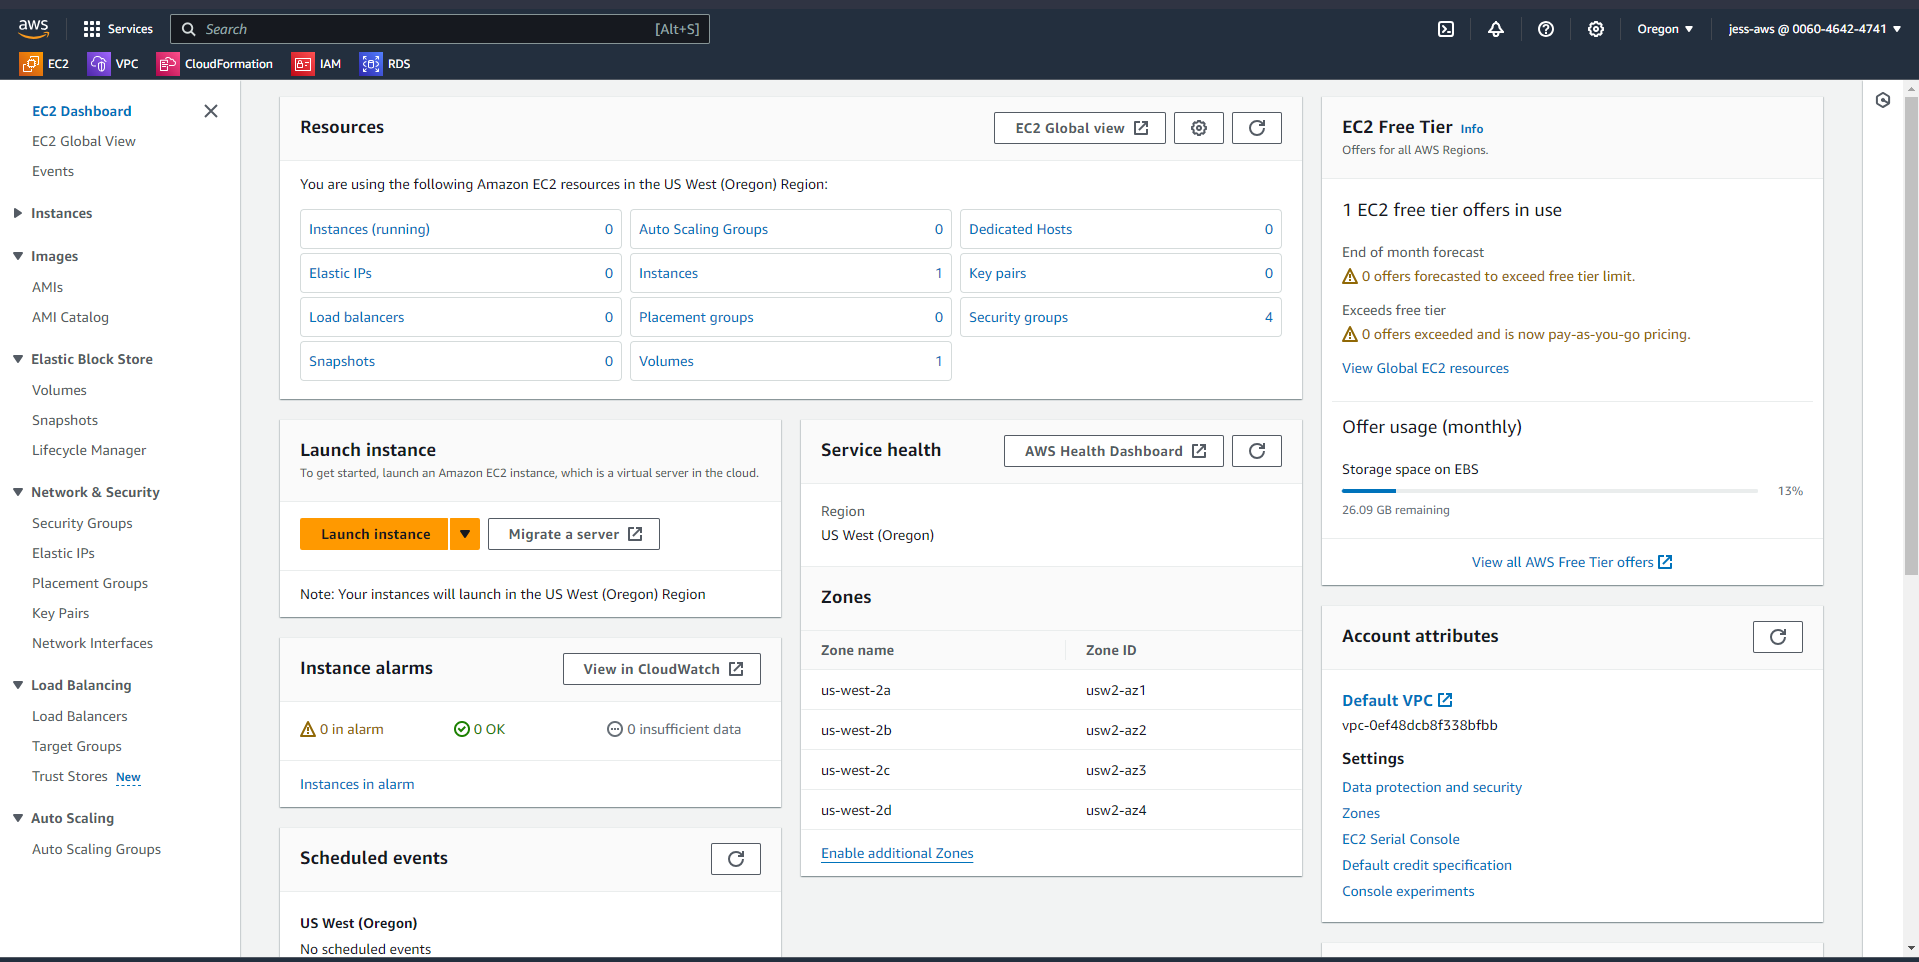
Once logged in, you will get a similar view of the AWS management console as below. Think of this like your control panel, with different buttons to launch virtual machines and other services like a pro. Today the focus is on the Amazon EC2.

Navigate the console
- Type EC2 in the search bar. You should get a view like the one below. Click on it. You can also have it pinned to the top bar for easy access in the future.

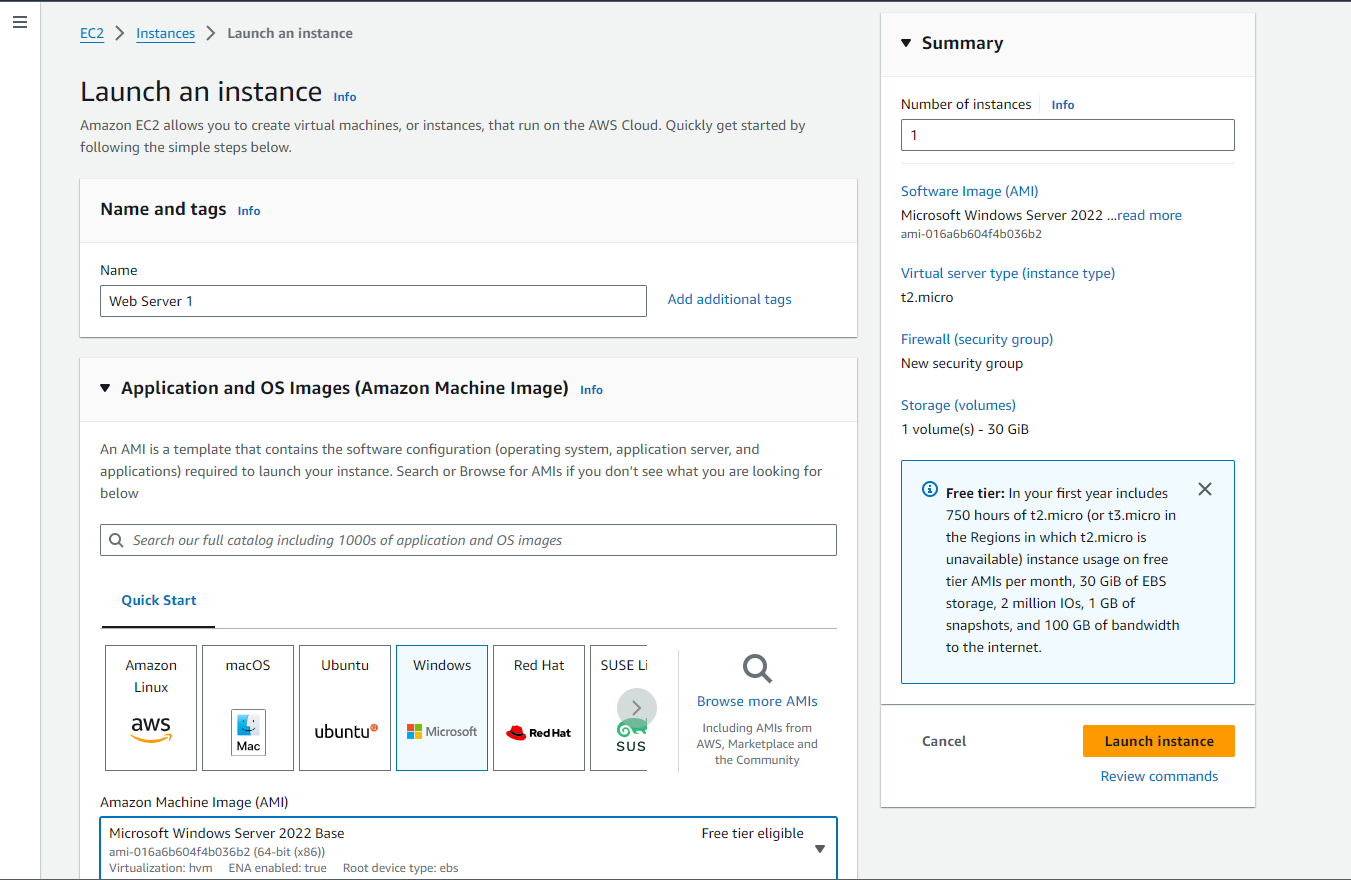
Launch an EC2 instance
On the EC2 dashboard, click on Launch instance. This is where you will pick your virtual machine and preferred features. For the configurations, we will stick to the basics.
Next, give your virtual machine a descriptive name for your instance under Name and Tags.
For Application and OS Images, select Windows, which will be the OS for your instance. Then, below it, select any Windows Server marked Free Tier eligible. This OS will be preinstalled on your instance
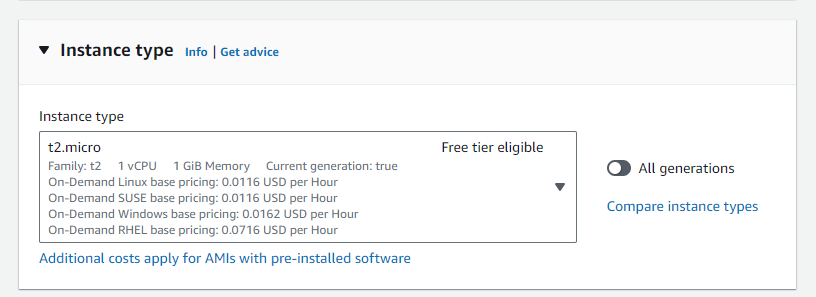
For Instance Type, select t2.micro, which is free tier eligible and perfect for basic Windows usage. Think of instance types as different apartment sizes in our cloud city. Some are small and cozy (perfect for basic tasks), while others are spacious and powerful (ideal for demanding workloads).
Then select Create a new key pair in the Key pair (login) section. On the pop-up window, select an RSA key, give it a name, and create a key pair.

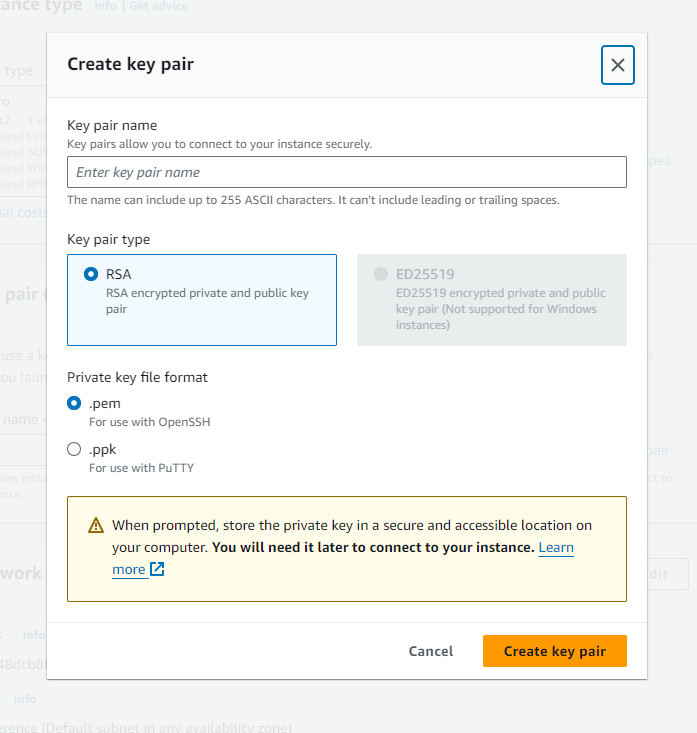
Remember, as you will see later, you cannot connect to your Windows instance without a key pair.
Keep most configurations in network settings as default, except for the security group. A security group is like a security guard who checks IDs before letting anyone in.
To set up a security group for our instance:
Click on Create new security group, then tick the checkbox with Allow RDP traffic from Anywhere.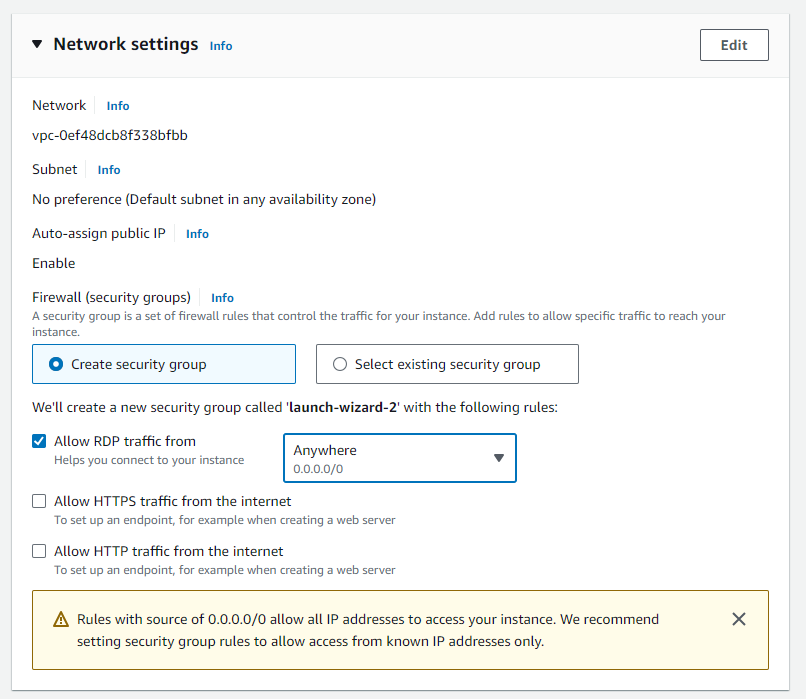
Keep the rest of the configuration settings as a default. You can now launch your instance.

On success, a banner will appear. Click the View All Instances to redirect to the Instances section. Wait until your instance state changes from pending to running as shown below. To view details of your instance, click on the Instance ID.

Connect to your instance with RDP
Once your instance is running, it's time to move in! Choose the Connect tab on the Instances page

Select the RDP Client to connect. This tool lets you see and control your Windows instance remotely, like a long-distance monitor and keyboard.

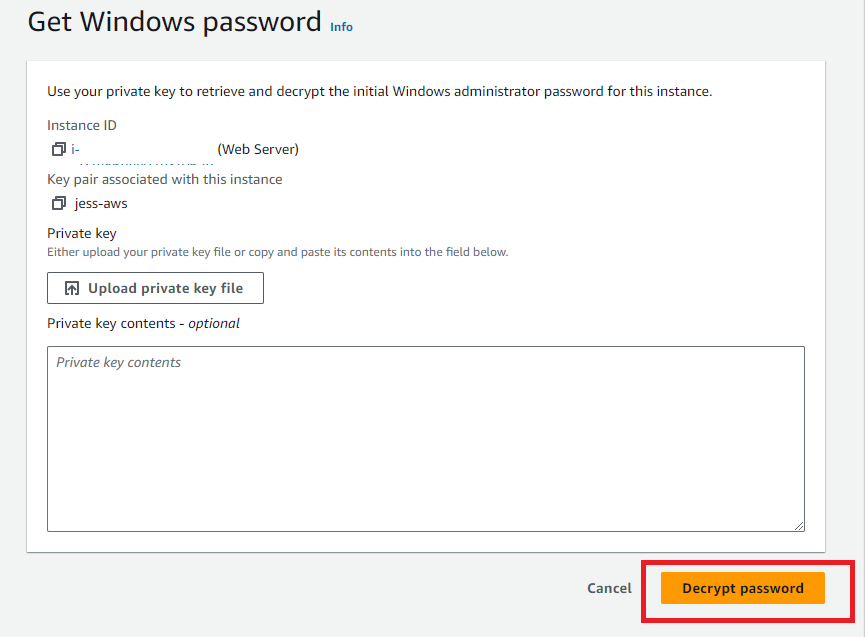
First, we need to retrieve the administrator password. So, click on Get Password. You will be prompted to upload the private key (.pem) file you created earlier. Then select Decrypt Password. Remember to save the Password on the subsequent window, as it is required to connect to the instance.
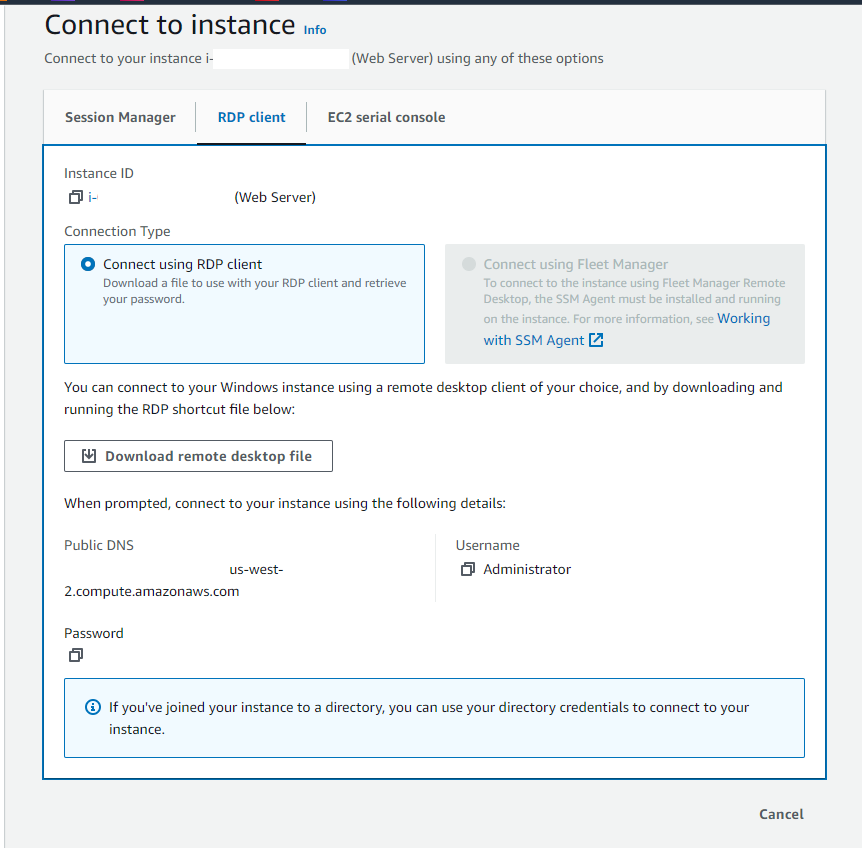
The next step is to Download the remote desktop file. Once done, click on the downloaded file for a similar dialog box. Choose Connect to proceed.

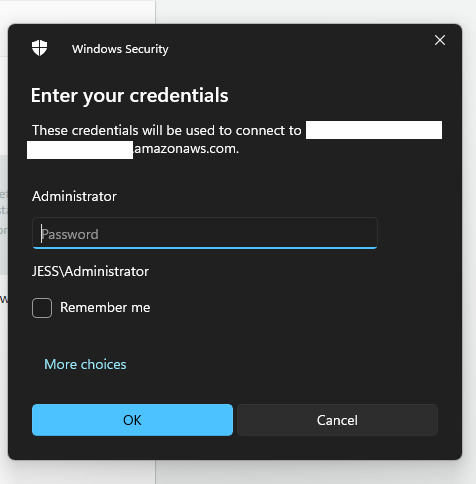
You will get a Windows security pop-up. Enter the admin password saved earlier to connect finally. You may get a warning to verify the security certificate; click Yes to continue.
- Congratulations 🎉, You're now virtually sitting in front of your Windows machine in the cloud.
Voila! Welcome to the Cloud
- Your Windows instance is like a blank canvas. You can install your favorite software, set up a web server, create a development environment, or even host a game server. The possibilities are endless. Explore the familiar Windows interface, personalize your settings, and have fun tinkering with your new cloud machine.
Bonus Tip:
Keep an eye on your billing. Be sure to stop your instance when not in use.
The free tier might have limitations, but it's a great way to learn and experiment before upgrading to a paid plan.
I hope this beginner's guide has empowered you to take your first steps into the cloud. Remember, the key is to experiment, have fun, and learn along the way. Happy cloud computing ☁️😄!
Leave a comment sharing your cloud experience.


